
The Problem
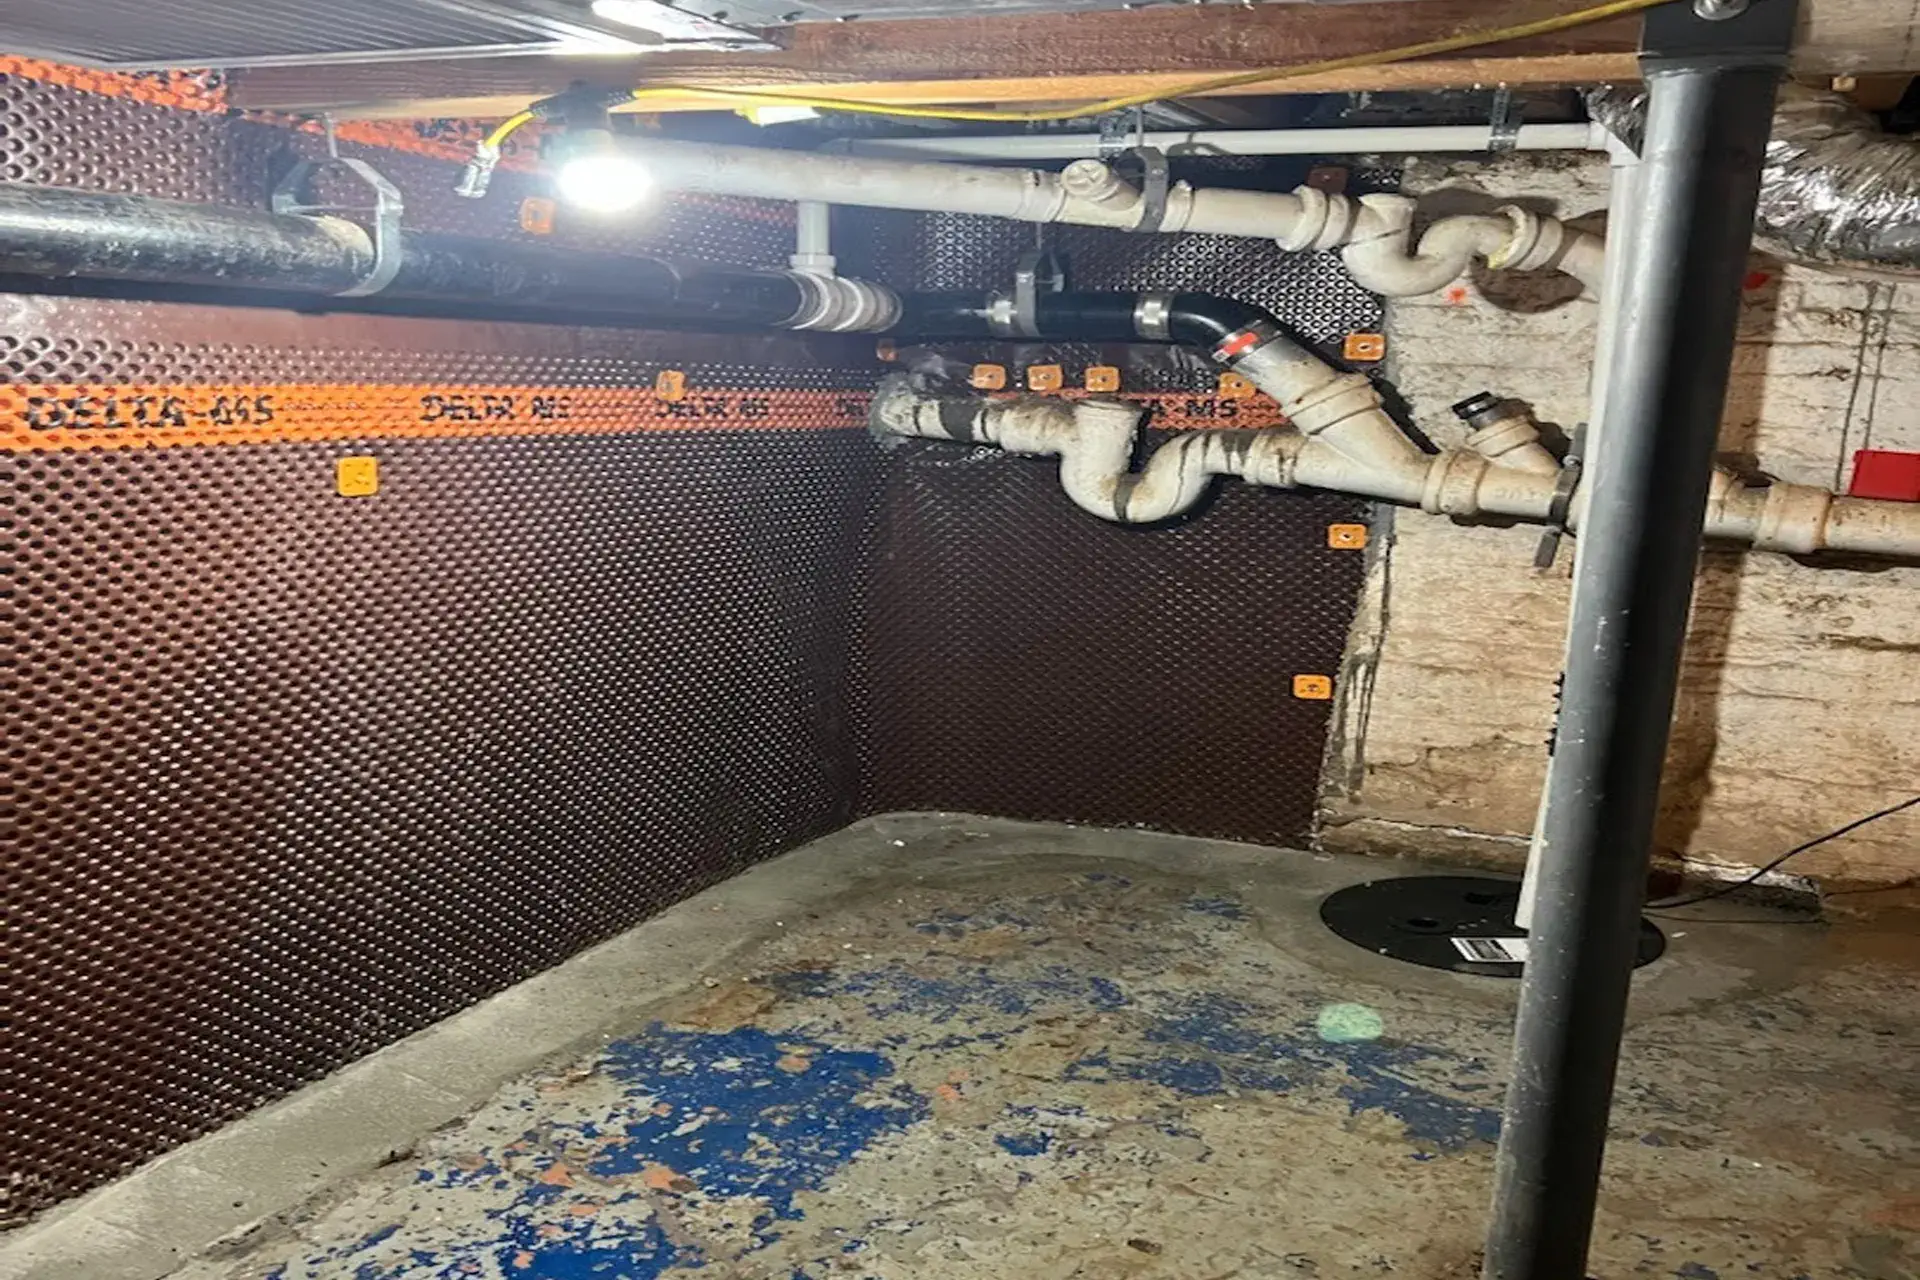
Water intrusion was affecting the basement along the back southwest foundation wall of this Brooklyn, NY home.
The affected foundation area measured approximately 17 linear feet and was about 70 inches high. The planned drainage system also extended approximately 3 feet around each corner, creating a total work area of about 23 linear feet.
Moisture in a basement can create more than just a wet floor. Persistent moisture can contribute to mold growth and make the basement uncomfortable to use.
Before beginning the waterproofing work, our team also identified mold contamination in the area. Because of this, the contaminated surfaces needed to be treated before the drainage installation could begin.
The goal was to address the water entering the basement and create a reliable path for water to move away from the foundation area.
Our Solution
Zavza Seal developed a complete interior drainage and waterproofing solution for the affected section of the basement.
The work included:
- Mold remediation
- Interior French drain installation
- New sump pump basin
- 1/3 HP cast-iron sump pump
- New water discharge line
- Dimpled waterproofing membrane
- Vapor protection
- New concrete slab over the drainage system
Step 1: Mold Remediation
Before installing the drainage system, our team treated the affected area for mold.
As part of the remediation work, we sanitized the area where necessary and sprayed contaminated surfaces with an all-natural disinfectant designed to remove mold and mildew.
The product used by the team is also designed to address viruses and bacteria. It is non-flammable, odorless and has a low EPA toxicity rating.
The purpose of this first step was to prepare the affected area so our waterproofing crew could safely continue with the basement work.
No non-approved workers were permitted in the area while remediation was taking place.
Step 2: Interior French Drain Installation
After the mold remediation work, our team began preparing the trench for the interior drainage system.
This type of system is also known as an interior French drain or pressure relief system.
We excavated the trench and removed the soil and debris.
A 2-inch layer of gravel was placed at the bottom of the trench. We then installed a 4-inch perforated PVC drain pipe on top of the gravel.
The pipe was wrapped with soil separator fabric. This helps reduce the amount of soil and debris that can enter the drainage system and allows water to flow through the pipe.
Additional gravel was placed over the perforated pipe to completely cover the drainage line.
The finished system creates a pathway for water to move away from the foundation area and toward the sump pump basin.
Step 3: Sump Pump Basin Installation
The drainage system needed a collection point where water could be gathered and removed from the basement.
Our team excavated an area for a new sump pump basin and installed the basin at the planned location.
Inside the basin, we installed a heavy-duty, high-efficiency 1/3 HP cast-iron sump pump.
The pump was connected with the required fittings and plumbing, including check valves and an ejector line.
The purpose of the sump pump is to collect water entering the drainage system and pump it away from the basement.
Step 4: Water Discharge
A new 1 1/2-inch discharge line was installed to carry water from the sump pump toward the sewer line.
The sump pump requires a separate electrical line. Electrical work was not included in the waterproofing estimate because the final electrical requirements needed to be determined by an electrician.
The homeowner could either have Zavza Seal coordinate an electrician or hire an electrician of their choice.
Step 5: Foundation Waterproofing and Vapor Protection
Installing a drainage pipe was only part of the solution. Our team also installed a dimpled Delta waterproofing membrane along the foundation wall.
The membrane was installed up to the top of the foundation wall and extended down below the perforated drainage pipe. The dimpled design provides a drainage space that allows incidental water to move downward toward the drainage system.
A vapor barrier was also installed over the drainage system to help limit moisture vapor from passing through the concrete slab. This created an additional layer of moisture protection between the basement and the foundation area.
Step 6: New Concrete Slab
Once the drainage and waterproofing components were installed, the trench needed to be covered.
Our team poured a new 4-inch-thick, 4,000 PSI concrete slab over the drainage system.
The concrete was troweled smooth and finished flush with the existing basement slab.
This allowed the repaired section to blend with the surrounding basement floor while keeping the drainage system below the surface.